TiWin Distal Radius Locking Plate
TiWin Distal Radius Locking Plate

Indication
The 2.7 mm distal radius system is indicated for the treatment of intra- and extra- articular fractures and osteotomies of the distal radius.
Polyaxial stabilization
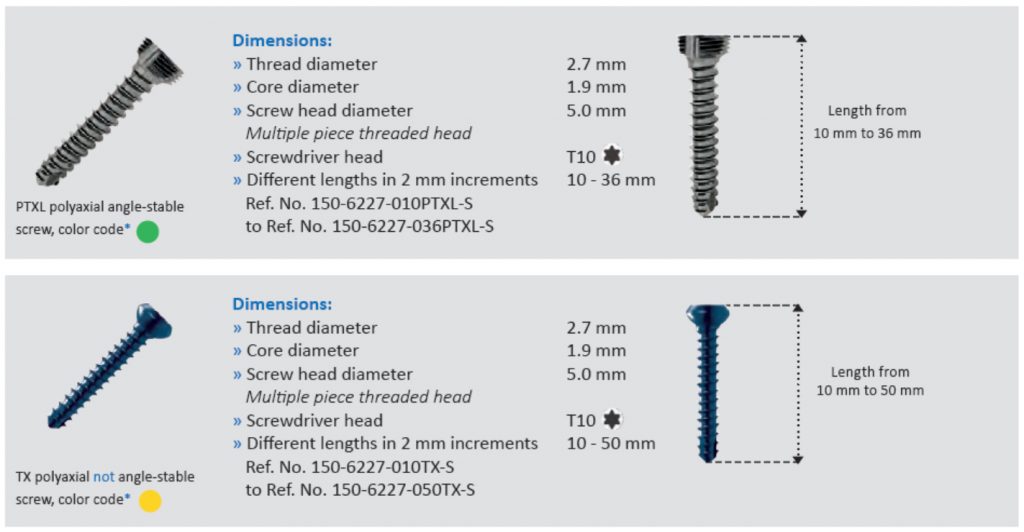
Using the polyaxial, funnel-shaped screw-in drill sleeve, you can insert the PTXL screws into the plate holes in a freely selectable angle of up to 15°. With polyaxial stabilization, it is advisable to check the direction of the drill with each drilling operation using an image converter to ensure that the joint surface is not damaged.
Monoaxial stabilization without drill guide
Using the monoaxial screw-in drill sleeve, the PTXL screws are inserted into the plate holes in the direction determined by the plate design. With monoaxial stabilization, always fill the distal, second plate hole on the radial side first. A first check of the drilling process using the image converter is required only with this plate hole. If the drill channel is outside the joint surface, all other screws will not affect the joint surface either, which means monoaxial stabilization eliminates the constant monitoring with the image converter.
Monoaxial stabilization with drill guide
Monoaxial stabilization using a drill guide corresponds to the procedure using the monoaxial screw-in drill sleeve.
Simply insert the plug-in drill sleeve into the corresponding holes for drilling. This is much faster as a rule. The drill guide does not have to be removed for measuring the screw length!
Self-locking screws
The [ti] win Torx 7 screwdriver is manufactured with very high precision. This high precision allows for the screwdriver tip being “wedged” in the screw head so that it is firmly connected with the screwdriver. When positioning the screwdriver in the head of the screw, make sure to press the screwdriver down into the screw head using a certain amount of pressure. If using insufficient pressure, the tip of the screwdriver may not penetrate deep enough into the screw head. If this is the case, the screw head may become damaged during tightening.
The [ti] win implants are all packaged individually and sterile and are color-coded. Please note the correct side when selecting the plate. Check packaging and labeling on the plate to ensure that the plate is for the correct side (“R” for right and “L” for left). The distal lip on the ulnar side of the radius plate is always the prominent one.
Soft tissue procedure
Make an approx. 5 cm long longitudinal incision radial to the tendon of the flexor carpi radialis (FCR). Incise forearm fascia between FCR and vascular bundle of nerves. Go to the pronator quadratus. Make an L-shaped incision on the fascia of the pronator quadratus and push the muscle from the distal radius towards the ulna. Then set the fracture.
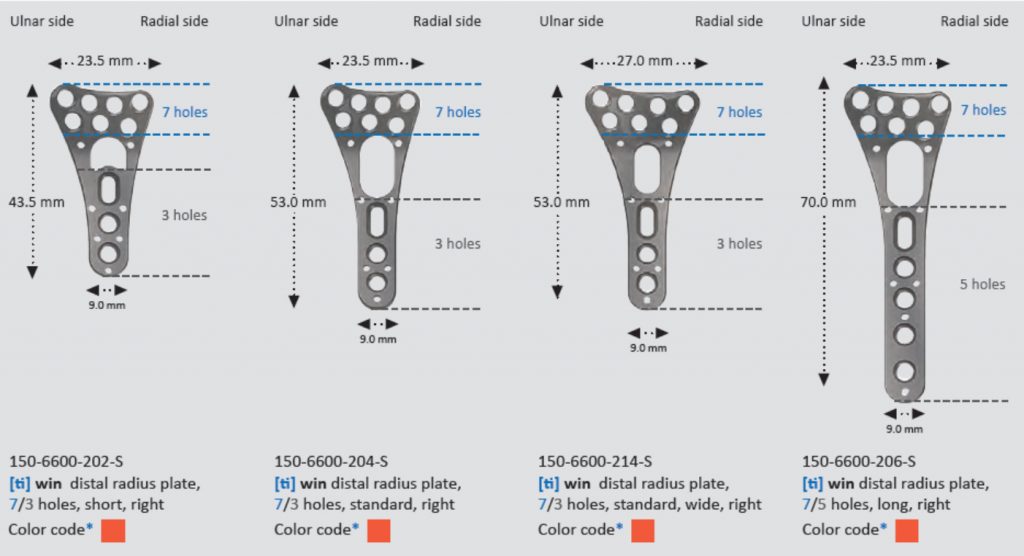
Radius Plate Right

TiWin Standard & Locking Screws

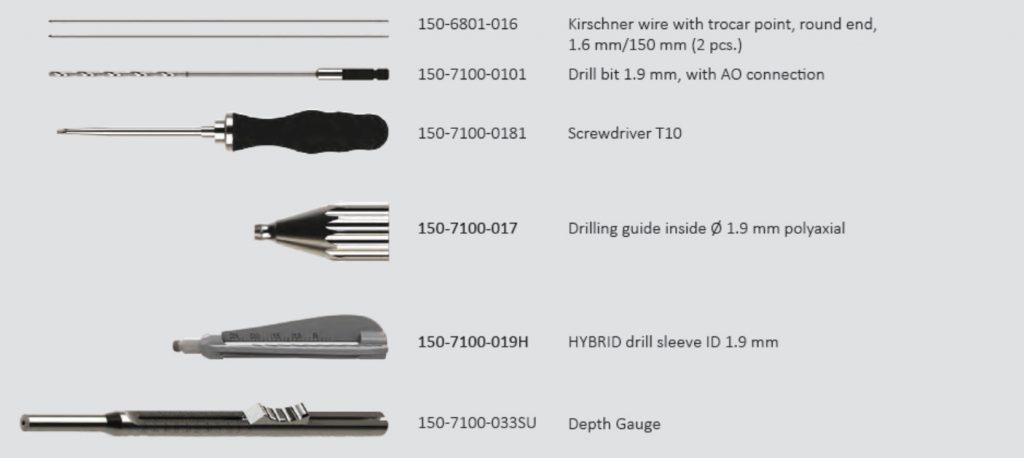
Radius Plate Instrument Kit

